|

Multi-Factor Authentication for SSH Login to Ubuntu Server

Overview

Secure Shell (SSH) is a vital protocol used for securely accessing and managing Linux servers remotely by authenticating using a user name and password.

CyLock MFA for Secure Shell (SSH) is a crucial component of modern cybersecurity strategies, offering enhanced security, resilience, and compliance adherence. By implementing MFA for SSH, organizations can effectively mitigate the risks associated with unauthorized access while maintaining operational efficiency and user experience.

Architecture Overview

CyLock MFAsteps up as a vital solution, demanding users to confirm their identity through multiple distinct methods. This fortifies the login access to Linux Servers, marking an indispensable measure essential for combating the dangers of password compromise, ensuring adherence to industry regulations, and, above all, safeguarding sensitive data.

CyLock PAMmodule can be installed on an Ubuntu Server to quickly enable two factor authentications during SSH login. A typical deployment architecture and process is shown below.
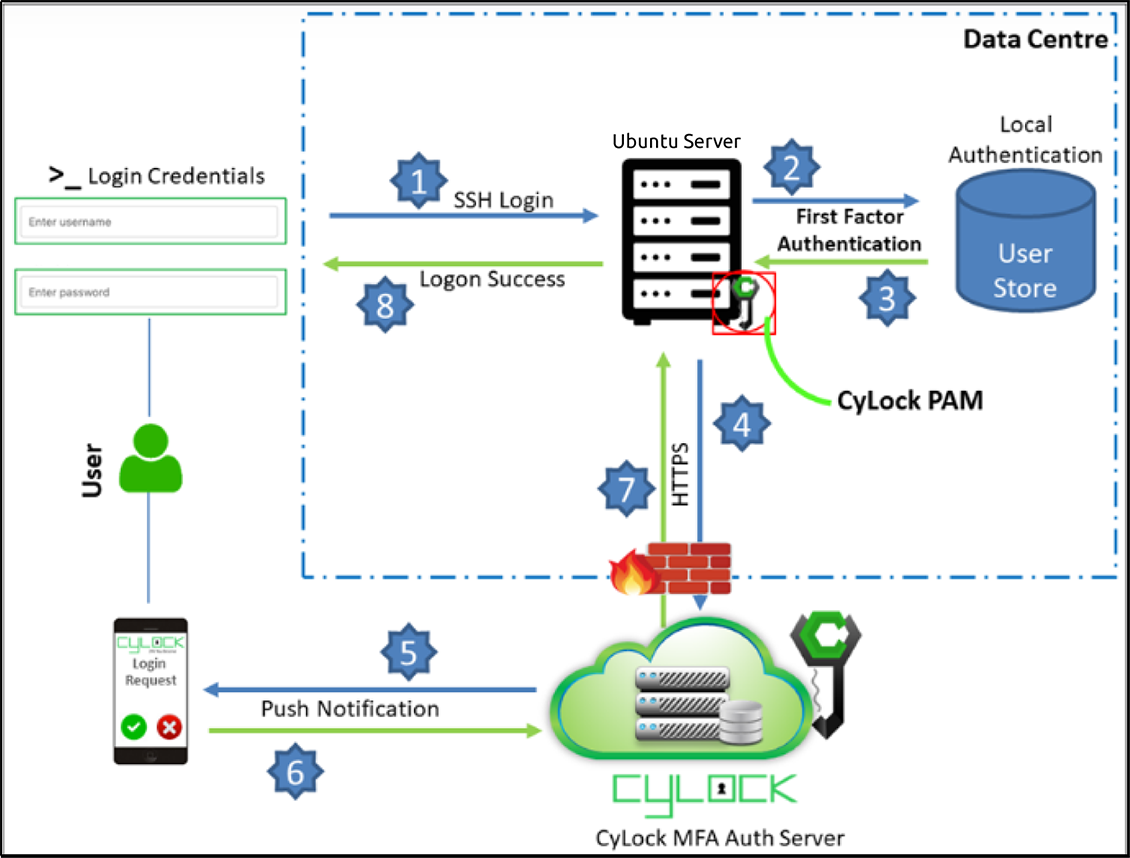
Deployment Architecture and process flow of SSH Login

Figure 1: Deployment Architecture and process flow of SSH Login

Prerequisites

  1. Securing an application requires an active CyLock MFA account. (Refer “Getting Started: Guide to CyLock MFA”to start using CyLock MFA to protect your applications).
  2. Login to “CyLock MFA Portal”
  3. Navigate to Application menu in the left menu panel
  4. Click “Add Application” button to secure an application. Locate and select “SSL VPN” from the list of application names. Click “+Secure” button to configure CyLock MFA for SSL VPN. Enter the details as requested and click “Save” button. Before leaving the page copy Application Key and Application ID, which are required during CyLock MFA RADIUS Proxy component installation. See “Securing an Application” for more information about protecting applications in CyLock MFA.
  5. Linux OS patches must be up to date.
  6. Download the CyLock PAM Module from the URL https://downloads.cybernexa.com/downloads/CyLock_PAM_Ubuntu_22_04.zip .
  7. Follow the instructions in “CyLock MFA PAM Module Installation” section to enable Multi-Factor Authentication (MFA) for SSH login.
  8. Download CyLock MFA Mobile App from Android or iOS store.
  9. Register SSH user using CyLock MFA Mobile app.

CyLock MFA PAM Module Installation

The CyLock MFA PAM Module can be installed on a Linux Server. We recommend a Server with at least 4 vCPU, 200 MB disk space, and 8 GB RAM.

Supported Linux Distributions:

This document pertains to Ubuntu Linux distribution. Download the CyLock MFA PAM module for Ubuntu and move the same in the respective Server.

Configuring CyLock MFA PAM Module

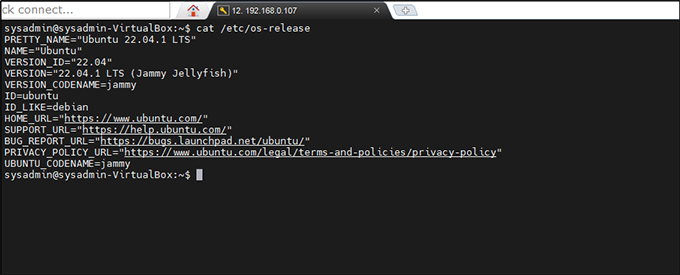
  1. Login to your Ubuntu Server, Here Ubuntu 22.04 Version is taken for example. You can verify the Linux server OS version using below command.

     cat /etc/os-release

    Verifying the Ubuntu OS version

    Figure 2: Verifying the Ubuntu OS version

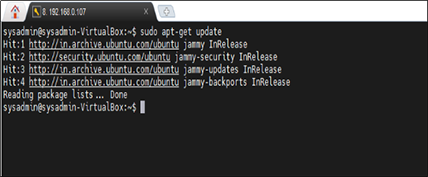
  2. Update the Package using below command.

     sudo apt-get update

    Updating the Package

    Figure 3: Updating the Package

  3. Move the CyLock MFA PAM module into the Ubuntu server.

    Here Mobaxterm is used for hosting SSH sessions, In Mobaxterm click on the ‘up arrow’ symbol at left hand side. Refer Figure 4
    Uploading CyLock MFA PAM module into the Ubuntu server
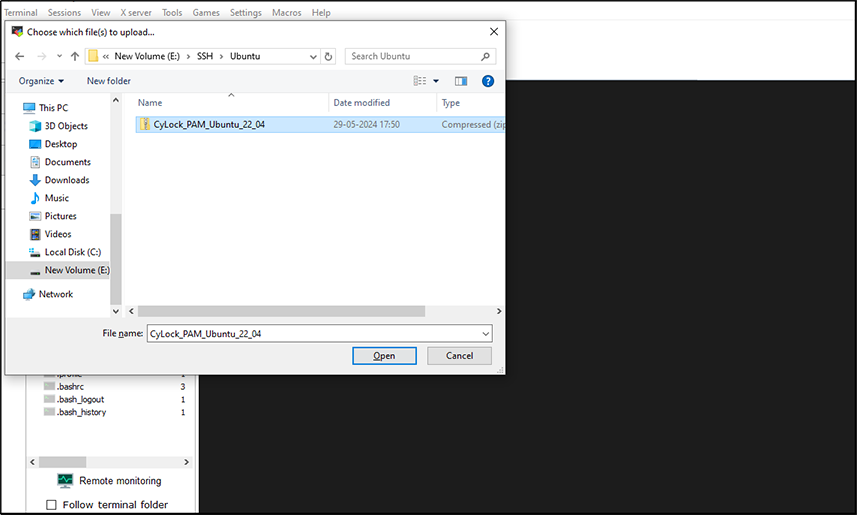
    Figure 4 : Uploading CyLock MFA PAM module into the Ubuntu server

  4. Then select the CyLock MFA PAM Module which usually be in zip format that you have downloaded in your system. This completes moving CyLock MFA PAM module into your Ubuntu server. Refer Figure 5. Selecting the downloaded CyLock MFA Ubuntu PAM module from the local machine

    Figure 5: Selecting the downloaded CyLock MFA Ubuntu PAM module from the local machine

  5. Type’ ls ‘in the terminal, you can see the PAM module in zip format listed as shown in the Figure 6.

     sudo unzip CyLock_PAM_RHEL_9_4.zip

    After you unzip the file, you can see an unzipped folder. Refer Figure 6.
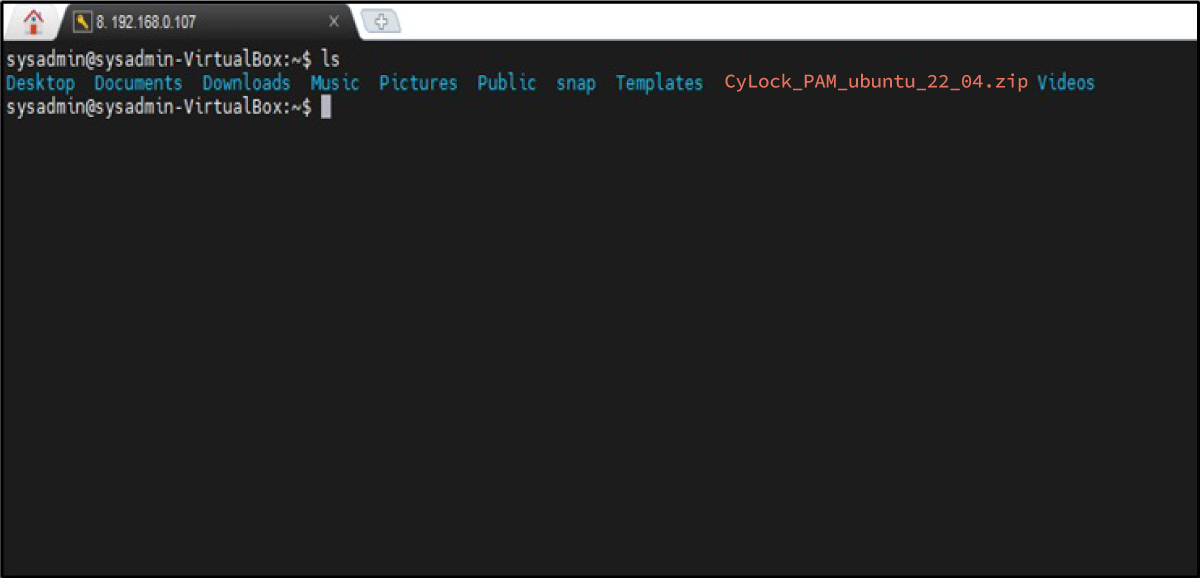
    CyLock MFA PAM module for Ubuntu is uploaded in the server

    Figure 6: CyLock MFA PAM module for Ubuntu is uploaded in the server

  6. Unzip the zip file using below command. Refer Figure 7.

     sudo unzip CyLock_PAM_Ubuntu_22_04.zip

    Unzip the CyLock MFA PAM module_Ubuntu

    Figure 7: Unzip the CyLock MFA PAM module

  7. After you unzip the file you can see an unzipped folder as shown in the Figure 8. Unzipped Folder

    Figure 8: Unzipped Folder

  8. Go to the folder, here you can see the CyLock MFA PAM module installer, uninstaller and readme files. Refer Figure 9.
  9. Now you need to run the CyLock PAM installer file to integrate the CyLock MFA PAM module to the server. For that you need to give executable permission to the PAM installer file using below command.

     sudo chmod a+x *.sh

    Giving executable permission to the installer file

    Figure 9: Giving executable permission to the installer file

  10. Before Running the CyLock MFA PAM installer, Login to the CyLock portal. Get Application key and Application ID using which you can integrate the CyLock MFA PAM module to the server. Refer Prerequisites #4 for ‘Securing an Application’ information.
  11. Run the cylock_ssh_installer.sh file to install the CyLock MFA PAM module in your Ubuntu server using below command.

     sudo ./cylock_ssh_installer.sh

    Running the CyLock PAM installer_Ubuntu

    Figure 10: Running the CyLock PAM installer
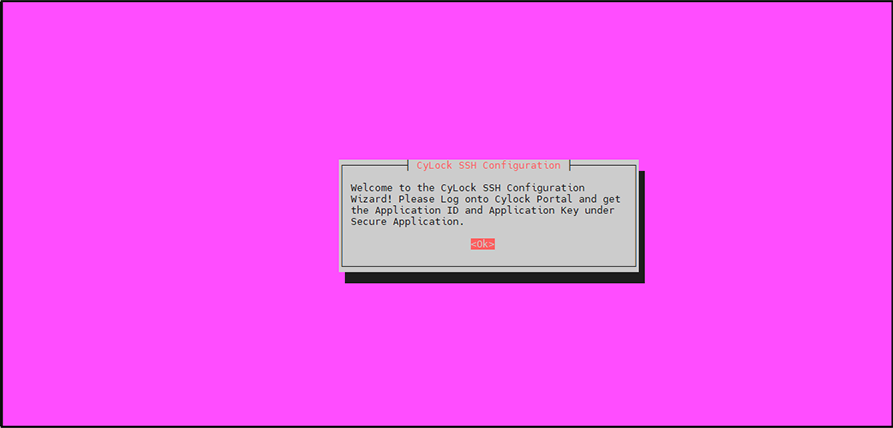
  12. While running the PAM installer, this will open CyLock SSH Configuration wizard on the screen. Follow the wizard as shown in the Figures 11 to 17. CyLock SSH Configuration setup wizard

    Figure 11: CyLock SSH Configuration setup wizard

    Enter the CyLock Auth Server URL and click OK, as shown in the Figure 12.

    Note: Contact CyLock Support Team to get CyLock Auth Server URL.
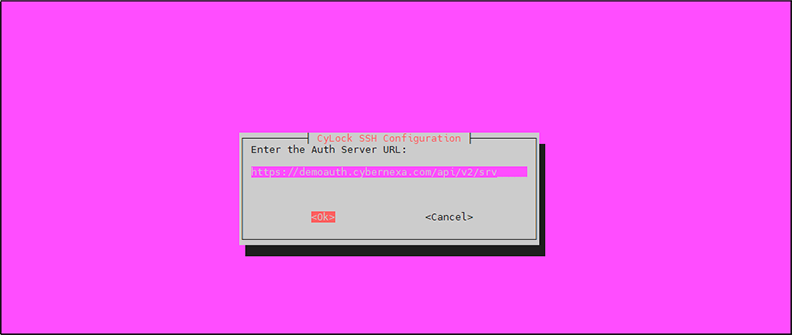
    Entering Auth Server URL

    Figure 12: Entering Auth Server URL

    Copy and paste the Application Key that was generated after securing the SSH Application in the CyLock portal and click OK.
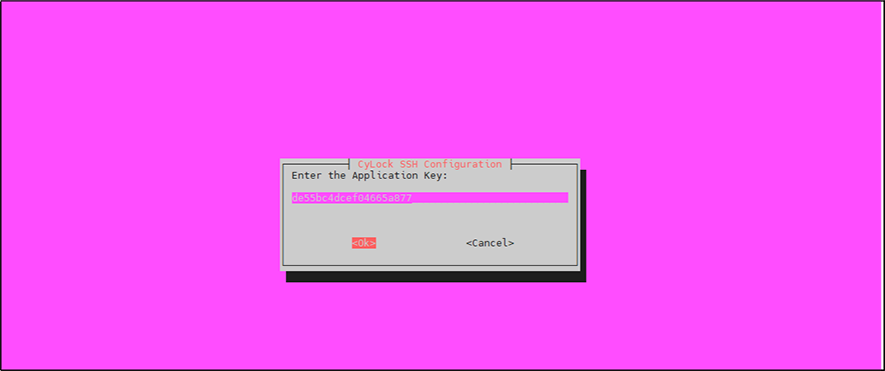
    Entering Application Key

    Figure 13: Entering Application Key

    Copy and paste the Authorization ID that was generated after securing the SSH Application in the CyLock portal and click OK.
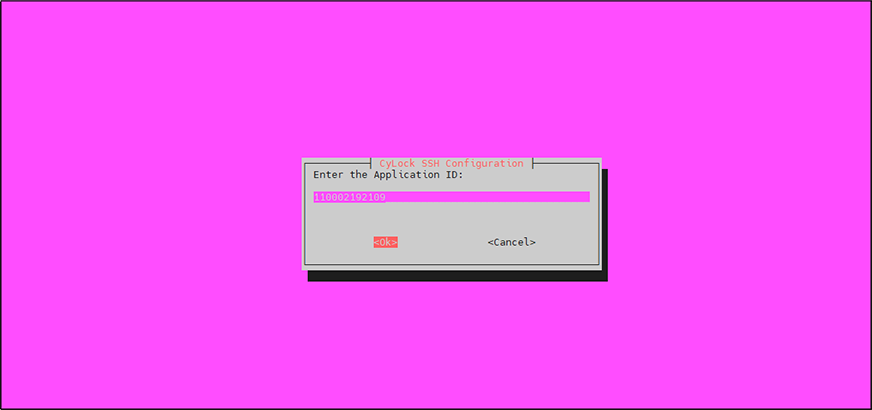
    Entering Application ID

    Figure 14: Entering Application ID

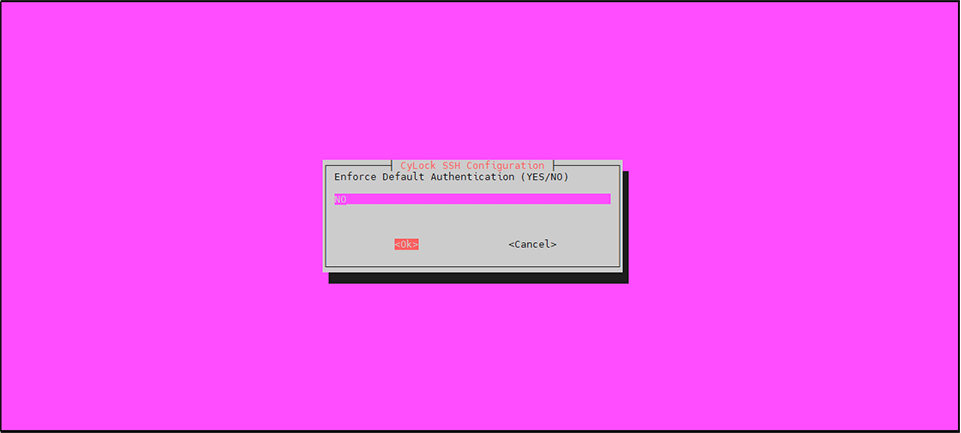
    Set the Default Authentication option (YES / NO) of your choice:

    •  If you set YES: The default authentication mode you set in the portal will be triggered during SSH login.
    •  If you set NO:Multiple MFA authentication modes will be displayed, allowing you to choose any mode for SSH login.
    • Click OK to proceed.

      Setting Default Authentication

      Figure 15: Setting Default Authentication

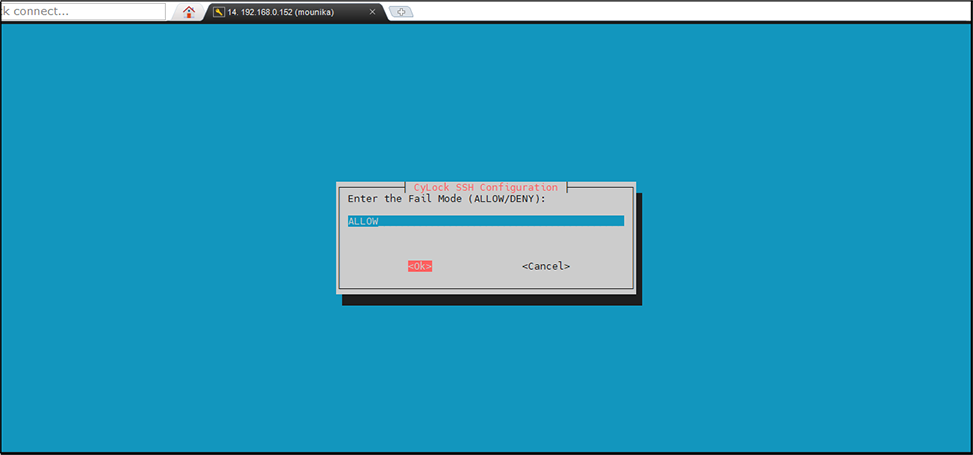
    Set the Fail mode (ALLOW / DENY) of your choice:

    •  If you set ALLOW: You can log in to Ubuntu server even if CyLock’s authentication server is unreachable.
    •  If you set DENY:You will be unable to log in to Ubuntu server if CyLock’s authentication server is unreachable.
    • Click OK to proceed.

      Setting Fail mode

      Figure 16: Setting Fail mode

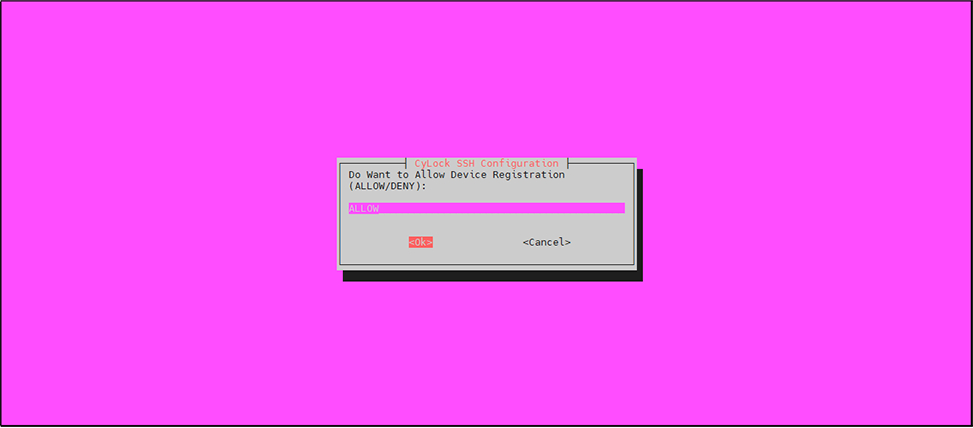
    Set whether you want to ALLOW or DENY Device Registration:

    •  ALLOW Device Registration:If an SSH user is created under the SSH application in the CyLock portal but has not done device registration, the terminal will display a device registration code. The user must enter this code into the CyLock MFA application that installed in mobile to complete device registration and proceed with authentication for SSH login. Device registration can be done during the SSH login process.
    •  DENY Device Registration:If an SSH user is created under the SSH application in the CyLock portal but has not done device registration, they will not be able to authenticate. Device registration cannot be performed through SSH login.
    • Click OK to proceed.

      Setting Device Registration

      Figure 17: Setting Device Registration

    Once the CyLock SSH Configuration set up wizard is completed, you will get ‘Installation and configuration completed successfully ‘success message as shown in the Figure 18.
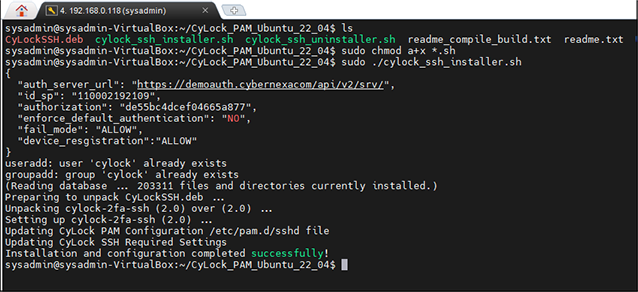
    PAM module installed successfully

    Figure 18: PAM module installed successfully

Test the Set up

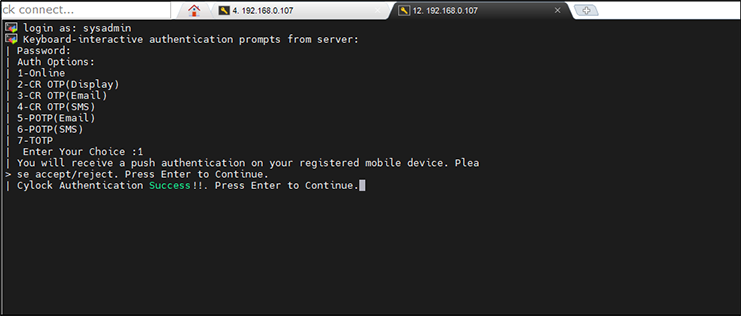
Now, attempt to log in to your server. After the first factor (1FA) is successfully verified, the second factor (2FA) will be triggered based on the user's default authentication method. Since the default authentication mode is set to 'NO,' you will be presented with multiple authentication options, as shown in the Figure 19. You can select any of these modes to complete the 2FA and gain access to Ubuntu server.

Supported Authentication options for SSH Login:

CyLock MFA Supports the below Authentication options to login Ubuntu server through SSH.

  1. Online (Push)
  2. CR-OTP (Display)
  3. CR-OTP (Email)
  4. CR-OTP (SMS)
  5. POTP ( Email)
  6. POTP (SMS)
  7. TOTP
  •  In the listed authentication options, the '1-Online' (Push) is selected here.
  • From List of supported Authentication modes, selected online (push)

    Figure 19: From List of supported Authentication modes, selected online (push)

    You will receive a push notification to your registered mobile as shown in the Figure 20.
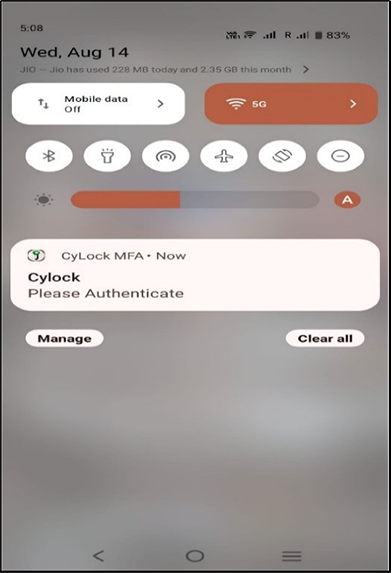
  •  Click on the received Push notification, it will take you to CyLock MFA App.
  • Received Push Notification in registered mobile
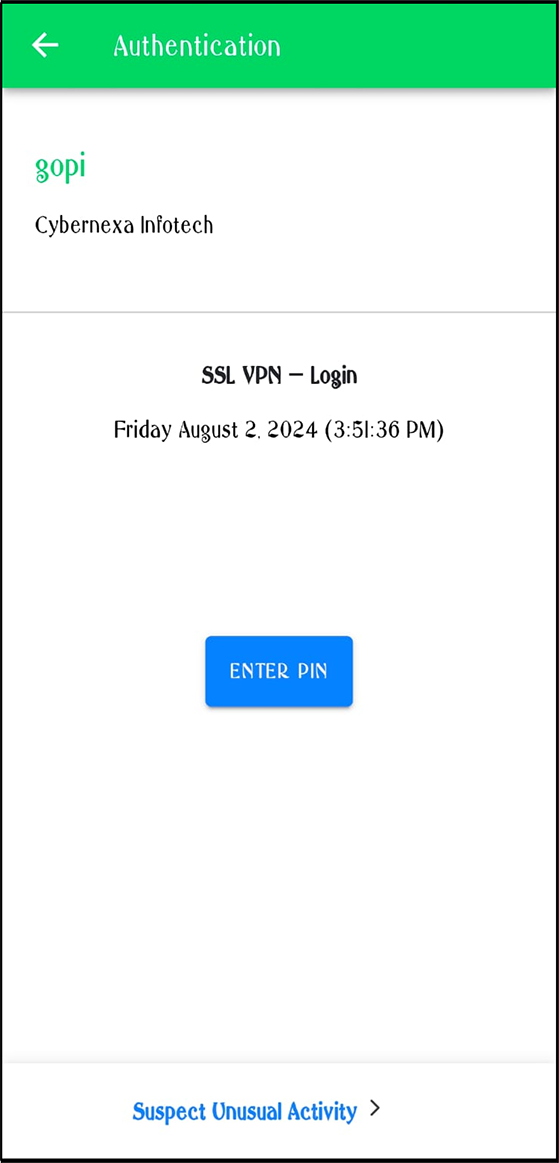
    Figure 20 : Received Push Notification in registered mobile

  •  Click to Enter PIN
  • Clicking on Enter PIN

    Figure 21: Clicking on Enter PIN

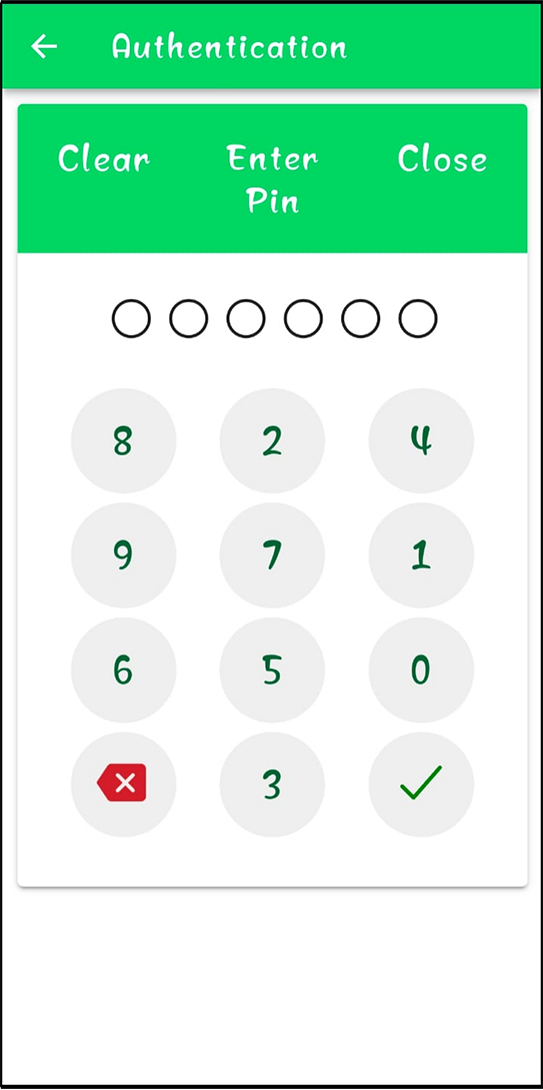
  •  Now it will prompt for entering the PIN that you have set during device registration.
  • Enter PIN prompt

    Figure 22: Enter PIN prompt

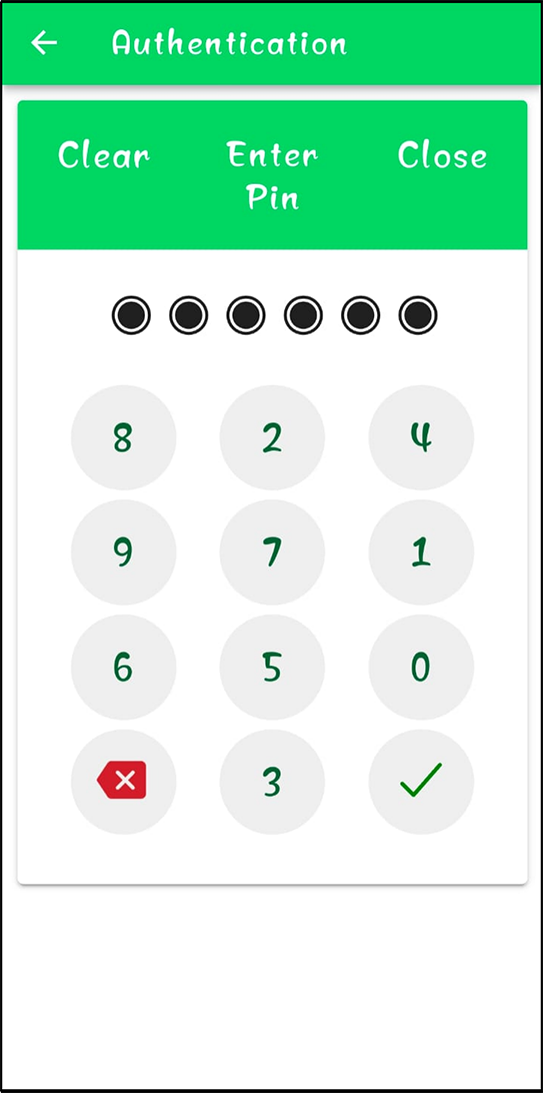
  •  Enter 6 digit PIN you have set and click on tick symbol.
  • Entering the 6 digit PIN

    Figure 23: Entering the 6 digit PIN

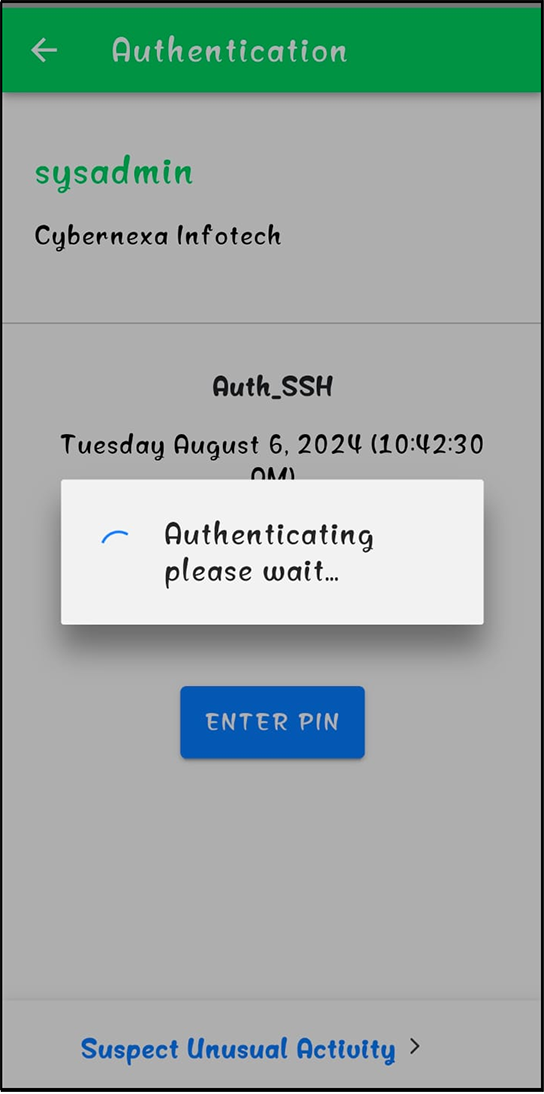
  •  Figure 24 shows the process of Authenticating.
  • Authentication processing

    Figure 24: Authentication processing

  •  Once the Authentication is done successfully, you can see Success message on the SSH screen as shown in the Figure 23.
  •  Press enter for SSH Login to the Ubuntu server.
  • Authentication Success message

    Figure 25: Authentication Success message

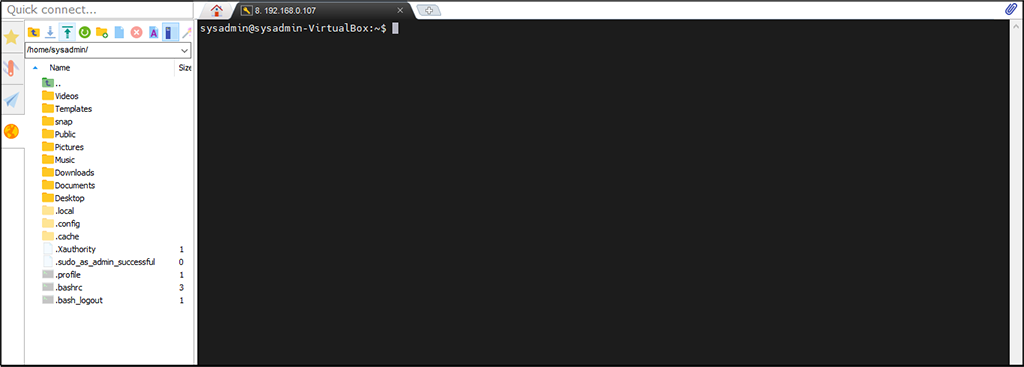
    Now you can do SSH Login to the Ubuntu server successfully using CyLock MFA.
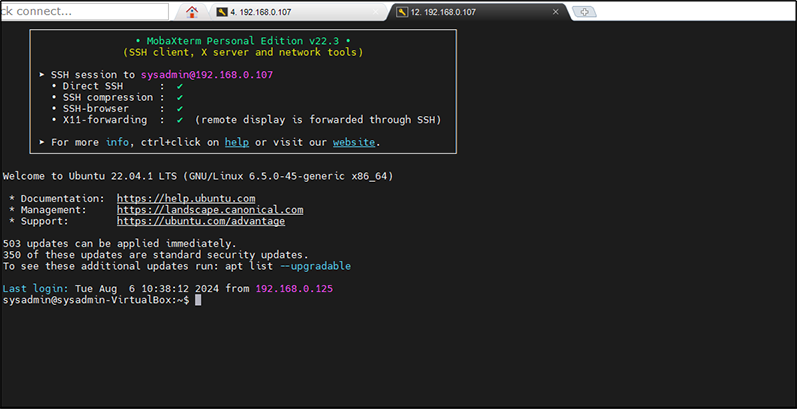
    Successfully done SSH Login to the Ubuntu server

    Figure 26: Successfully done SSH Login to the Ubuntu server